
Journey in Wing Making
Welcome! I am so happy to have you here! This blog is sparse, but here you can find the feather templates that went into the wings I created for my Rito costume. The templates are numbered/lettered following this:
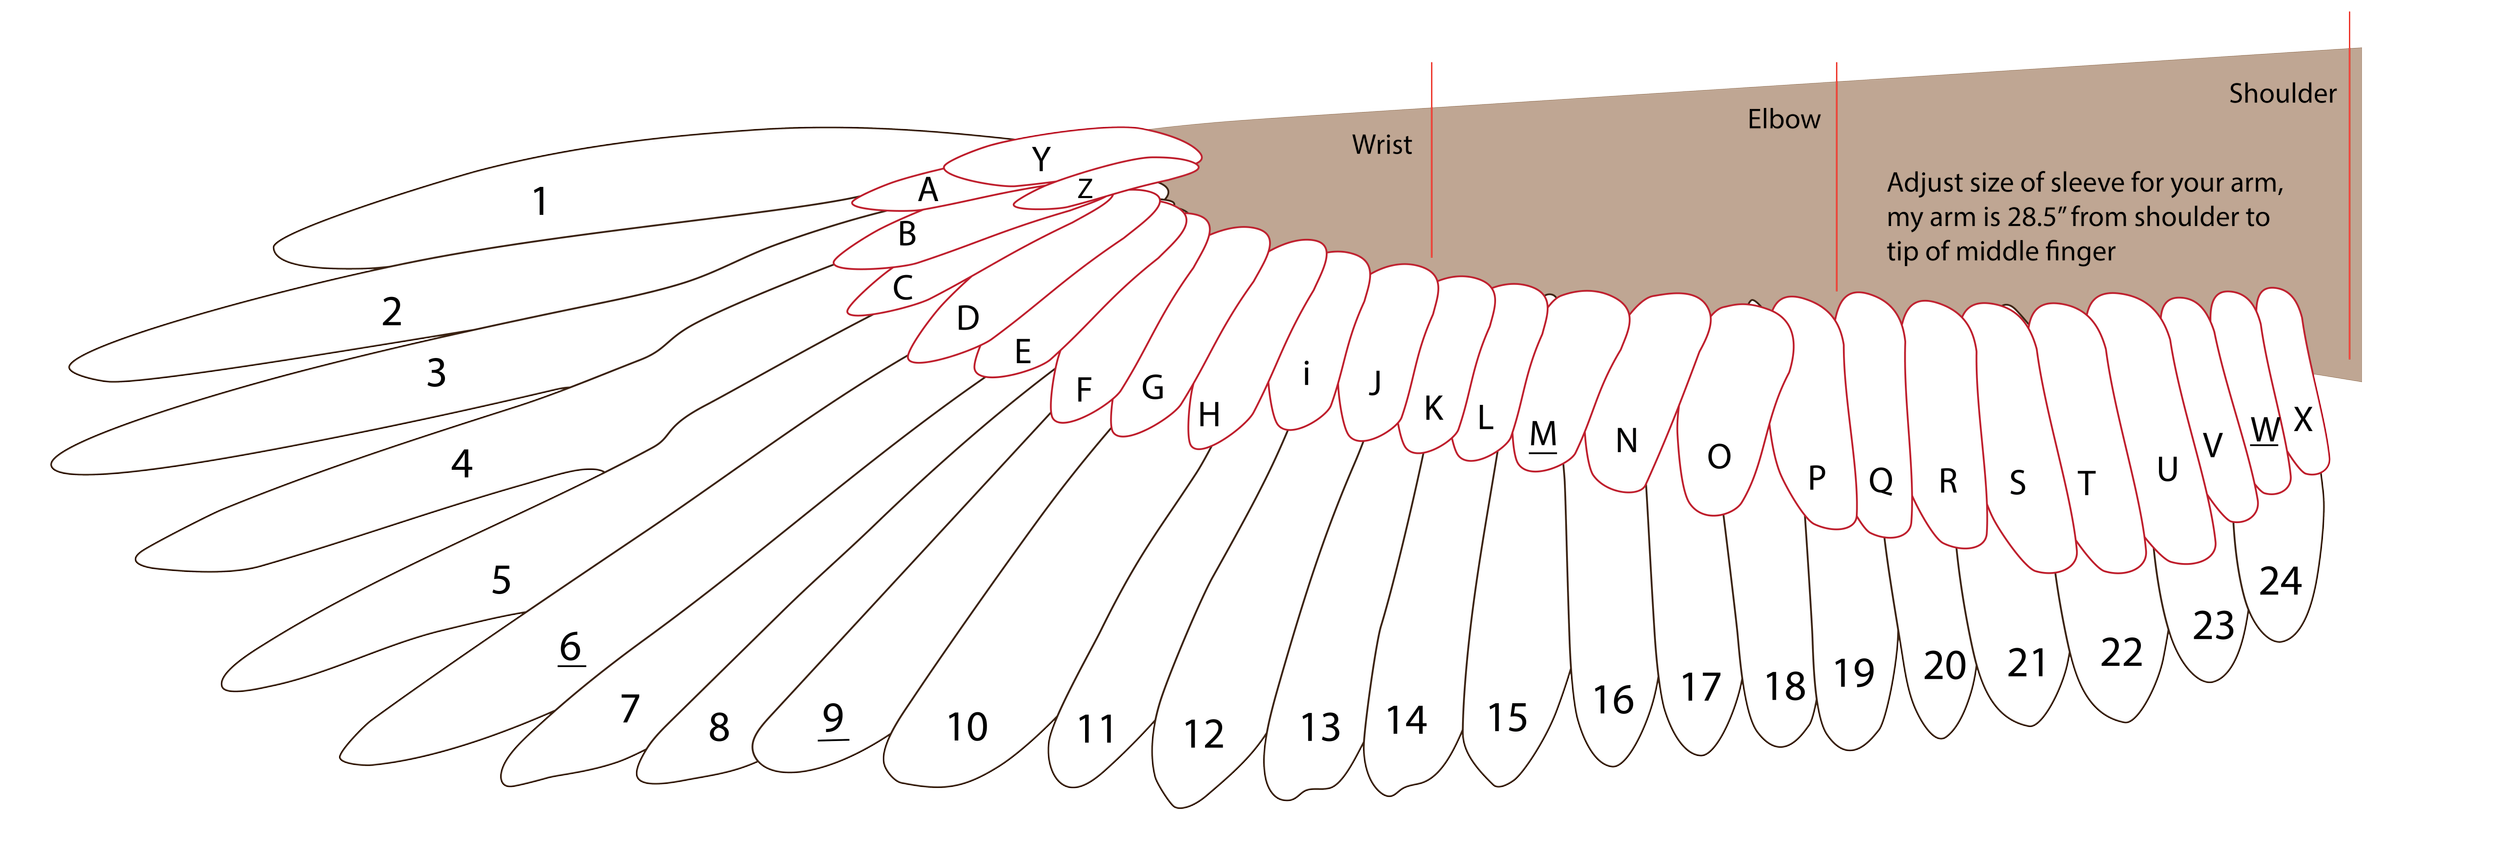
Brief instructions:
Use 2mm foam for the feathers
Cut out 2 of each number (one for each wing)
Cut out 4 of each letter (for the front and back of each wing)
If desired add a vane to the numbered feathers, making sure that they are mirrored for each wing. You can use foam clay, stick on foam, wire, boning etc. See my video for how I did this, but I am not claiming it was the best option. I am sure there are other ways
Paint the feathers following the bird you have chosen (I did a Red-Tailed Hawk) again make sure that there are mirror images to put onto each wing. The numbered feathers will get painted on both sides and the lettered feathers only need to be painted on one side, but remember these will likely look different on the front and back of the wings, so label and keep track of which side will be facing out on each wing. I used an airbrush, but you can get a similar result with a paint brush, just go light on the paint.
Create a base sleeve for your arm (sorry I don’t have a template) its basically an L with a curve connecting the two legs. I used canvas that was stiffened with polyester strapping.
Hot glue the numbered feathers to the sleeve base (do not skimp on the glue, this helps stiffen the wings)
Hot glue one lettered row to the front of the wing and the other row to the back side of the wings.
Cover the arm sleeve with a high pile fur.
I hope that helps! If I get enough interest I will write a longer tutorial with more templates. Have making! I would love to be tagged in pictures on Instagram if any wings get made. I want to see them all!
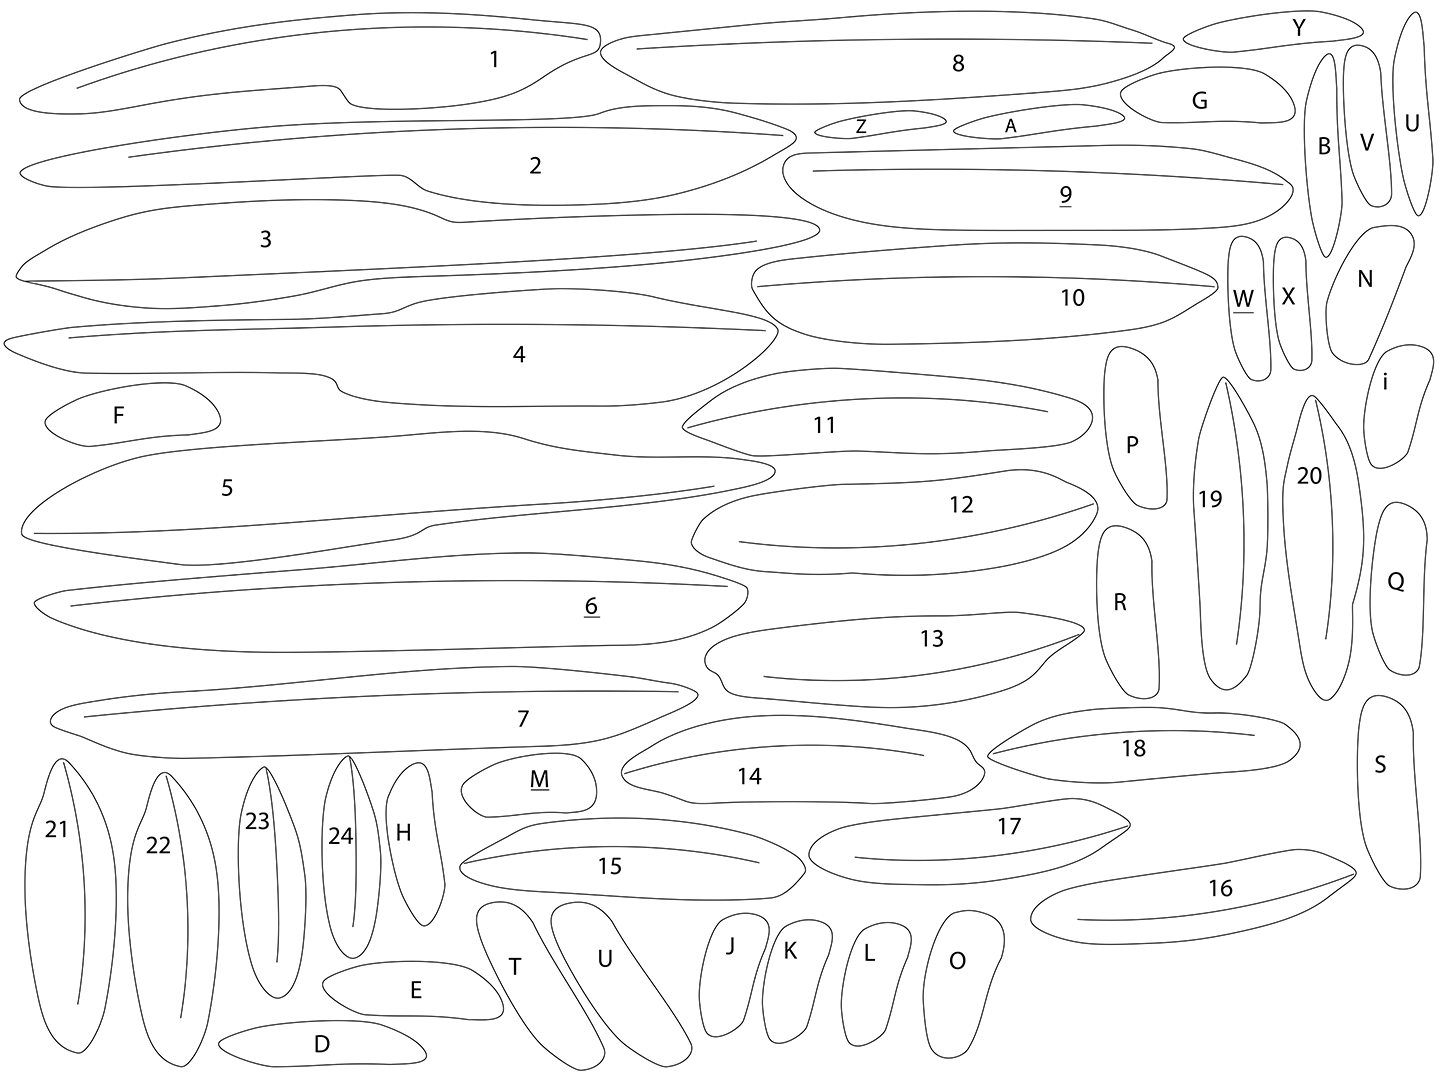
These are the feather templates I created to make the wings for my Rito Costume. They are not professional quality, but I want to share them to help anyone else enjoy some wings too.
In the zip folder you will get:
a PDF of uncut templates (its 48” by 36”, ARCH E) this is the easiest thing to scale if you want to make the wings bigger or smaller. For reference my arm is 29”
A PDF of the templates tiled for printing on Letter sized paper (cut out and tape together)
A PDF of the templates tiled for printing on A4 sized paper (cut out and tape together)
A PDF of the layout with numbers and letters labeled to put it all together
A SVG file for the templates that you can use on a Cricut or laser for automated cutting
Enjoy! If you want to support me and my ability to share templates and tutorials for free please subscribe to my YouTube channel or follow me on Instagram. There is also a donation button at the bottom of this page, if you want to support me that way. Thank you so much! Enjoy making some wings!