
Instructions for Foundation Paper Piecing
Links marked with * are affiliate links. As an Amazon Associate I earn money from qualifying purchases at no cost to you. I am not sponsored ahead of time to use these products. They are the ones I choose to use, but if you buy anything through my links I get a small commission that helps me create more content.
These instructions are designed to be used with the paper piecing patterns that I create. Some patterns use different numbering/lettering systems than I use, but the basics here can be used for patterns designed by others. The video version of this tutorial with a simple project is linked to the right. There is a free apple pattern available on my website, with the web version of this tutorial. If you would like a pattern to practice with, go ahead and take a look!
If there is any confusion at any point while working on your project, you can email me at Cucubocrafts@gmail.com and I will answer as quickly as I can. If you come across a problem with the pattern, please let me know and I will fix it.
I would love to see your finished project, Happy Sewing!
~JO

This is a simple paper piecing project designed to go with my tutorial (found here: Journal)
It is slightly above a beginner pattern but can be used to learn the processes that are useful for more advanced patterns. There are a mix of sizes and shapes to explore.
What’s Included In a Cucubo Crafts PDF Patterns:
Paper Piecing Tutorial, This same information in PDF form
Sewing Order, specific for your pattern
Cutting Templates*, includes all pieces with color indicator and 1/4” seam allowance.
Paper Piecing Templates*, organized by letter
Full Design Image, a simple image to show what the front of the project will look like with all pieces outlined.
Mirror Image, in black and white with labels to show what it will look like on the paper side. Depending on size possibly two documents; one fit to a page, one at true size across multiple pages.
Fabric Usage, using 43-inch-wide fabric
*The only two documents that need to be printed
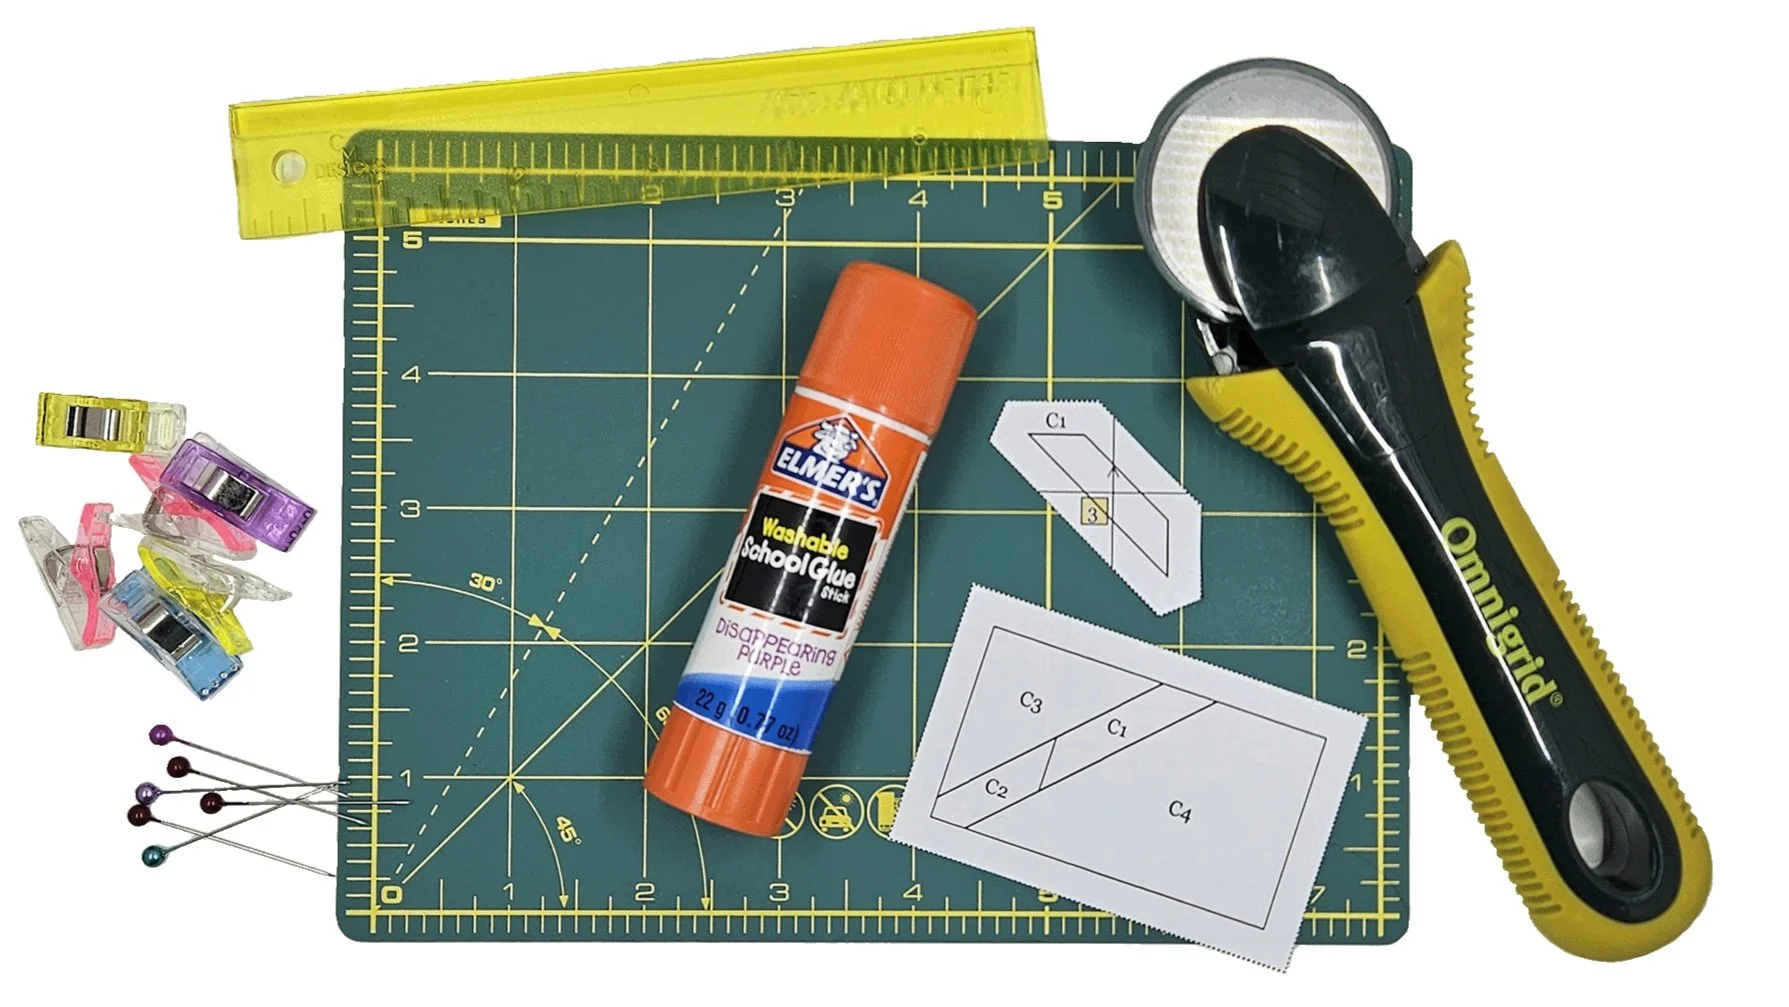
Useful Materials
Glue Stick (Elmer’s Washable school glue* works well) or straight pins
Rotary cutter* and cutting mat*
Quilting clips (like Wonder Clips*)
Beginner friendly piecing paper* (its thin)

Step 1: Cutting
Each shape has a cutting template. For larger pieces, match and glue together templates at the numbered “glue edge” lines (extra paper can be left there for a stronger seam). Cut fabric roughly around each template, precision isn’t necessary, as you’ll trim while sewing.
Notes:
Templates are not mirrored, so place them on the right side of the fabric.
Arrows on the templates indicate the top of the design. Align the arrow with the pattern direction if using directional fabric.
Step 2: First Shape
Stick together larger paper piecing templates the same way as the cutting templates. Follow the numbers on the template for the order that you will add pieces to the foundation.
Starting with piece 1, Place a small amount of glue on the back side of the paper within the shape and stick the fabric over the shape with the right (pretty) side facing out away from the paper. You can also use a straight pin or two if you prefer that to glue.
To help position the shape correctly you can use a window or light-box. Make sure there is at least 1/4” of fabric around the edge of the shape.
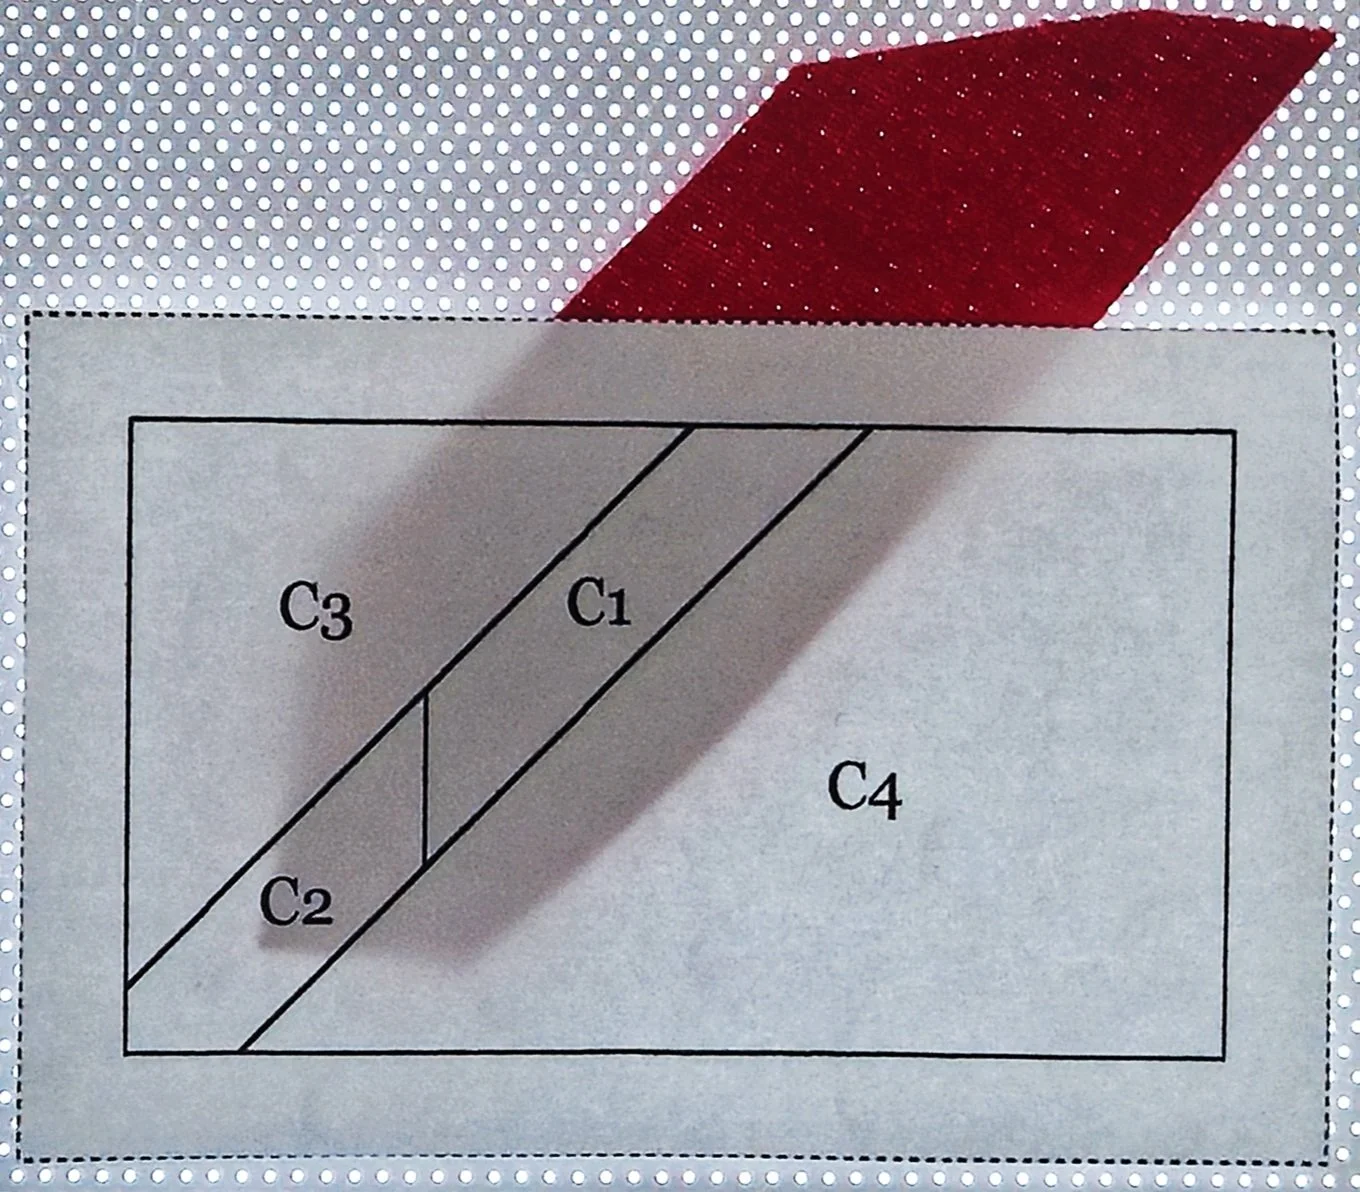
Step 3: Lining up the pieces
Take piece 2 and, with right sides together, place it over piece 1 (Figure 1), so that there’s at least a 1/4” seam allowance along the line between them (Figure 2). Make sure that when piece 2 is folded at that line, it fully covers its shape with 1/4” extra on all sides. This can take some fiddling, especially with awkward shapes, which is why I leave extra fabric around the cutting templates for easier placement.
If you’re worried about the fabric slipping, you can add a bit of glue or a pin in the seam allowance. I personally skip this step and rarely have issues with fabric shifting.

Figure 1

Figure 2
Step 4: Joining Piece 1 & 2
With the printed side of the paper facing up, line up your machine needle with the line between pieces 1 and 2. Start sewing slightly before the line begins, and continue a few stitches beyond the end of the line (Figure 1).
Test-fold piece 2 open and hold it up to a light source (or lightbox) to make sure it covers the entire shape with a 1/4” seam allowance (Figure 2).
And remember, there’s no shame in seam ripping and readjusting! I usually need to redo a seam at least once in a project.
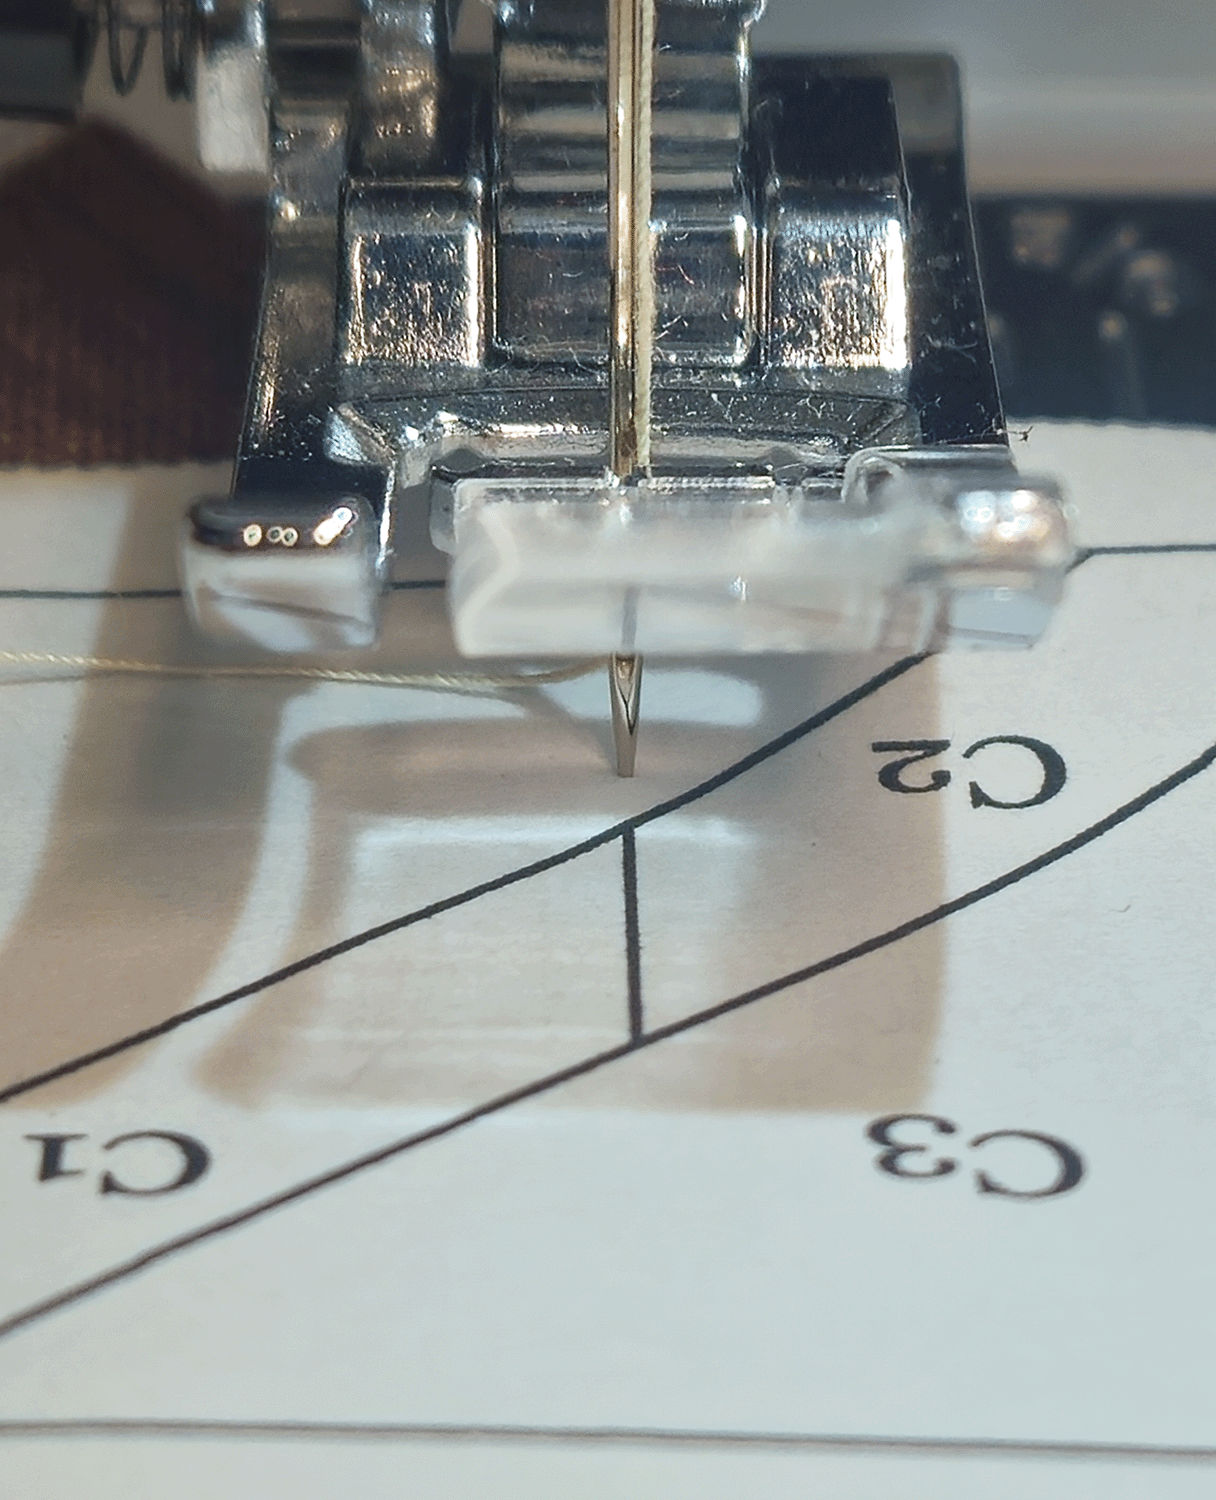
Figure 1
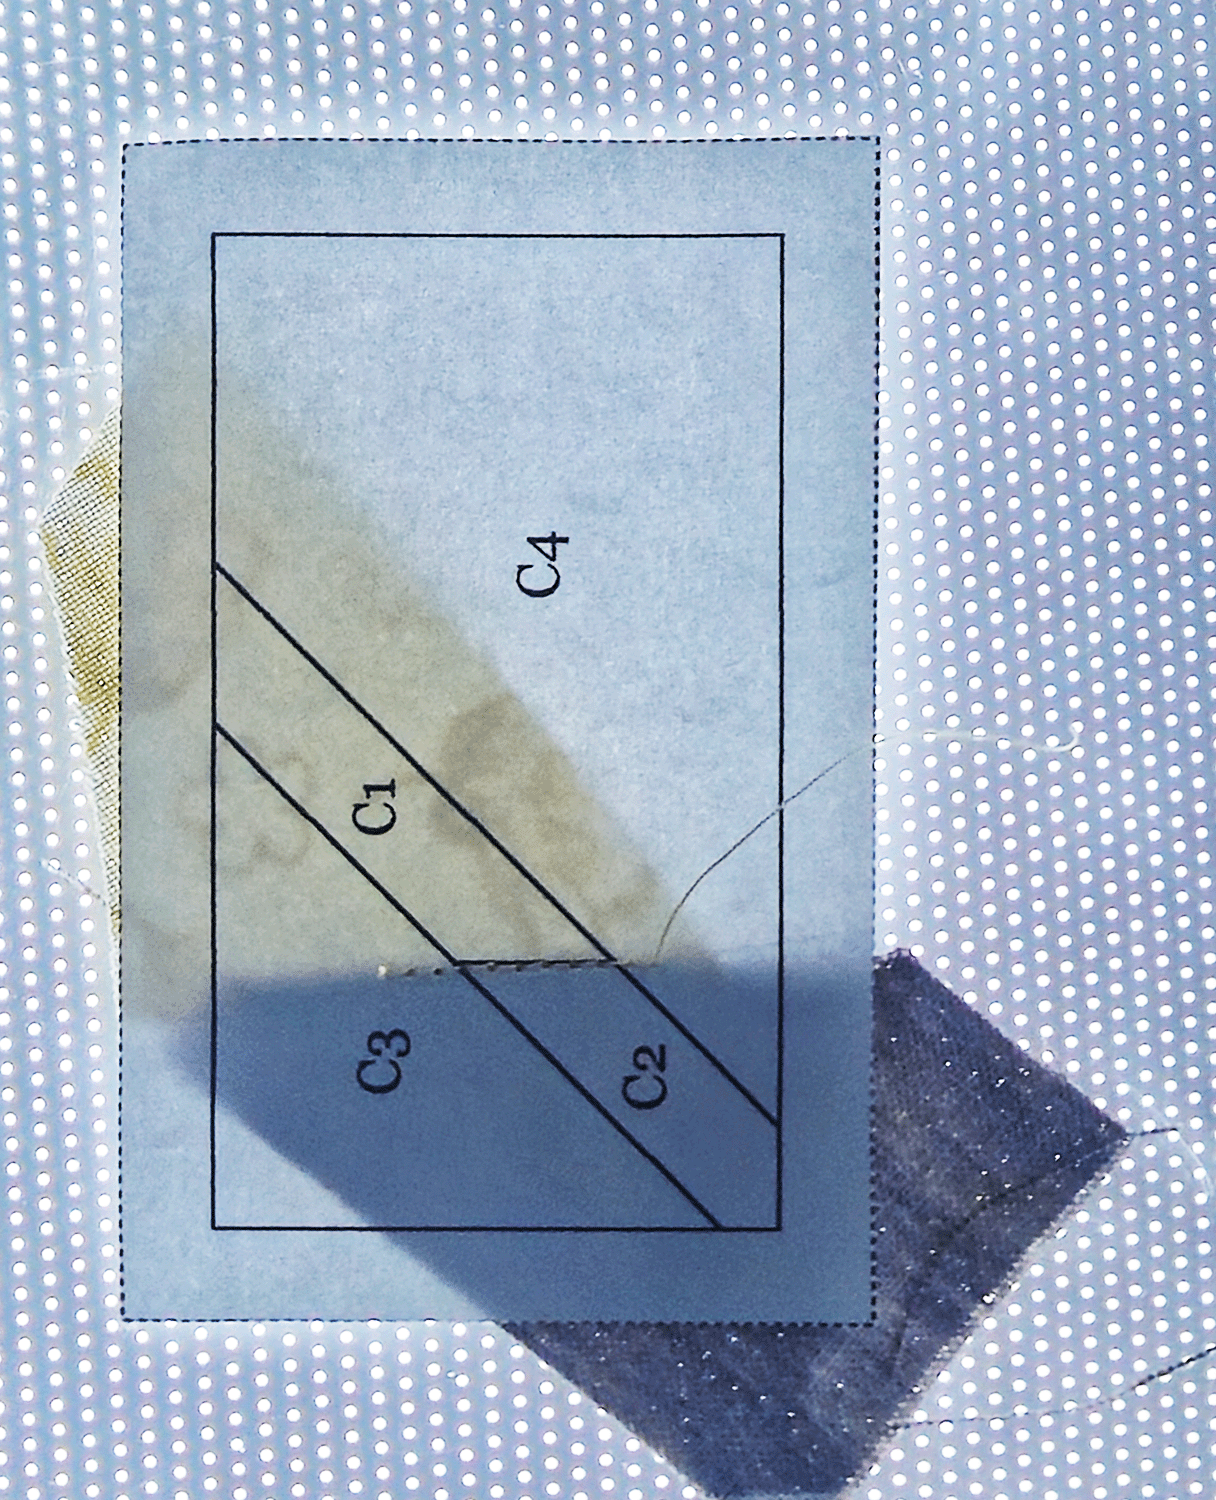
Figure 2
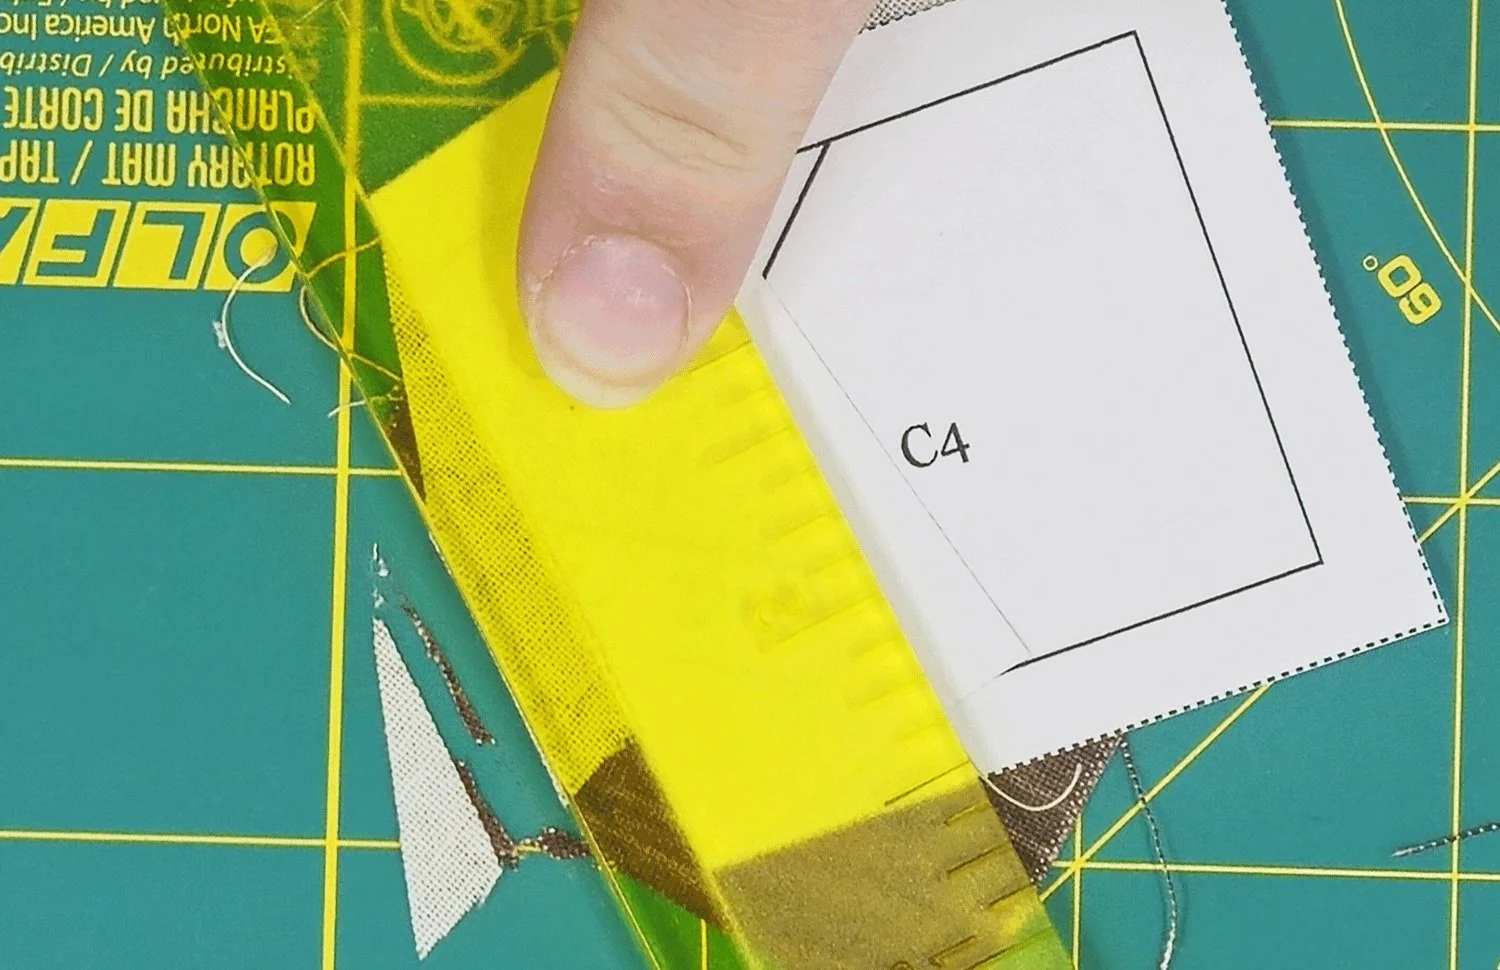
Step 5: Trimming Seam Allowances
This step is easiest with an Add-a-Quarter ruler, but any quilting ruler will work.
Once you’re sure the fabric placement works, place the fabric back to right sides together. Then, fold the paper back along the stitch line so that only the seam allowance is visible. Place your ruler along this fold and trim the fabric to a 1/4” seam allowance.
Add a small amount of glue or a pin to secure piece 2 in place when folded open before moving onto piece 3

Step 6: Next Pieces
Repeat steps 3 and 4 in numerical order until every number on the template has been completed. As you go, you may need to gently tear the paper slightly along previous stitch lines to fold it for seam trimming, this is normal and won’t affect your final piece.
DO NOT TAKE OFF THE PAPER YET
Once you’ve finished one shape, repeat steps 2–4 for each additional lettered template (A, B, C, etc.).
When each section is complete, trim any excess fabric to the edge of the paper template (the dotted line).
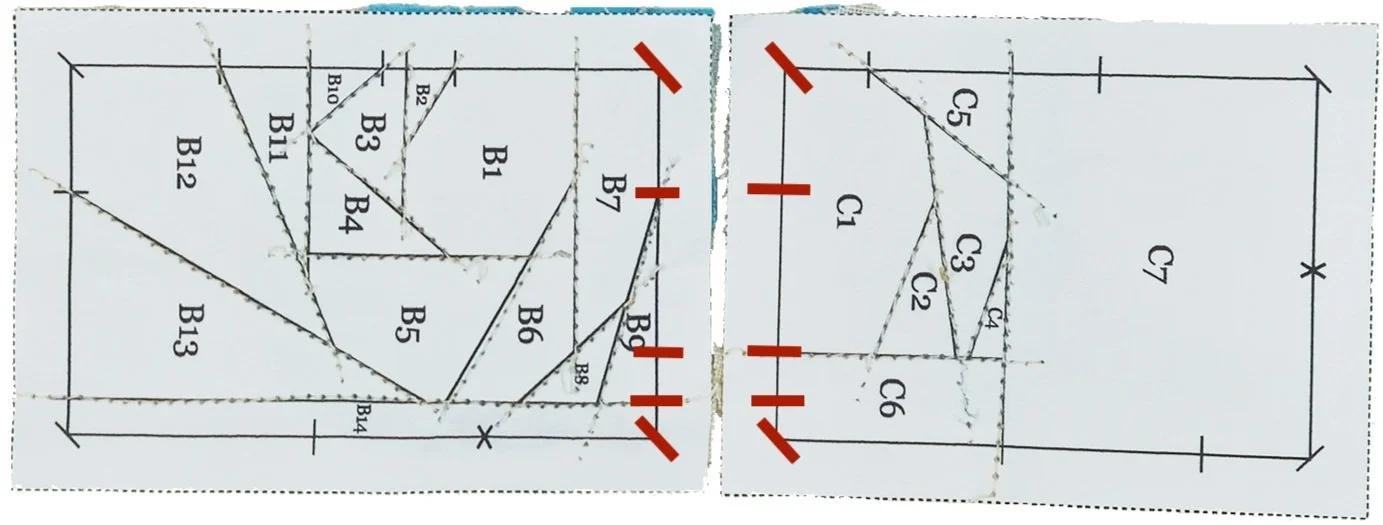
Step 7: Add Letters Together
Once all your paper piecing templates are complete, it’s time to sew the sections together. Refer to the separate document labeled Sewing Order for the correct assembly sequence. For example, if it says C+B+A, sew sections C and B together first, then attach A to that combined piece.
Each paper piecing template includes alignment markers (shown as red lines in the picture). Line these up as accurately as possible and use fabric clips to hold the sections together, clips are preferred over straight pins because they’re less likely to shift or warp the fabric.
Sew along the solid line at the edge of the shape (paper extends out for the seam allowance), just like you did when adding individual pieces.


Step 8: Remove the paper
Your pattern is now complete! Use your fingers and/or tweezers to gently take all the paper off the back of the block.
It should come off fairly easily if you used a smaller stitch and larger needle, but if a little gets stuck it won’t matter it will either dissolve in the wash or not be noticeable when batting is added.
The rest is up to you! Quilting style is unique to the person, but don’t hesitate asking my opinion is you can’t decide how to quilt your project, I would be happy to help. I love to see pictures, so feel free to send me the pictures of the finished product.